Getting Protective Gear Right Before Stepping Onto the Field
Protective equipment in baseball and softball is designed to dissipate violent kinetic energy away from vulnerable bones, joints, and soft tissue. When gear fits loosely or sits out of alignment, that protective barrier collapses, exposing players to severe contusions, hyperextension, or concussive force. Choosing the right sizes requires taking precise anatomical measurements rather than guessing based on standard clothing tags or age recommendations.
Young athletes often fall into the trap of wearing oversized gear intended to give them room to grow, while older players sometimes cling to worn-out padding that has lost its structural integrity. Neither approach is safe. Equipment must fit securely right now to disperse impact properly, whether you are taking fastballs off the mask behind home plate or standing in the batter's box against high-velocity pitching.
Taking time to measure your head circumference, understand hand positioning inside a catcher's mitt, and evaluate torso length ensures that padding rests where impact is most likely to occur. Before heading out to live competition or sharpening your swing at local batting cages and hitting facilities, establishing a methodical sizing process prevents preventable injuries and builds genuine confidence during every repetition.
Modern equipment incorporates advanced composites and moldable polymers, but the underlying principle remains unchanged: gear must stay locked in place under rapid athletic movement. If a helmet twists when you turn your head, or if a chest protector rides up when you drop into a blocking stance, the gear cannot perform its intended job.
Understanding Thumb Injuries Behind the Plate
Catchers face repetitive ballistic stress every time a pitcher throws, with balls frequently crossing the plate with heavy sinking action or erratic tailing movement. When a ball misses the pocket and strikes the thumb directly or forces the mitt backwards, the thumb joint experiences severe hyperextension. Over time, this leads to chronic sprains, bone bruises, or serious ligament damage that can sideline a player for months.
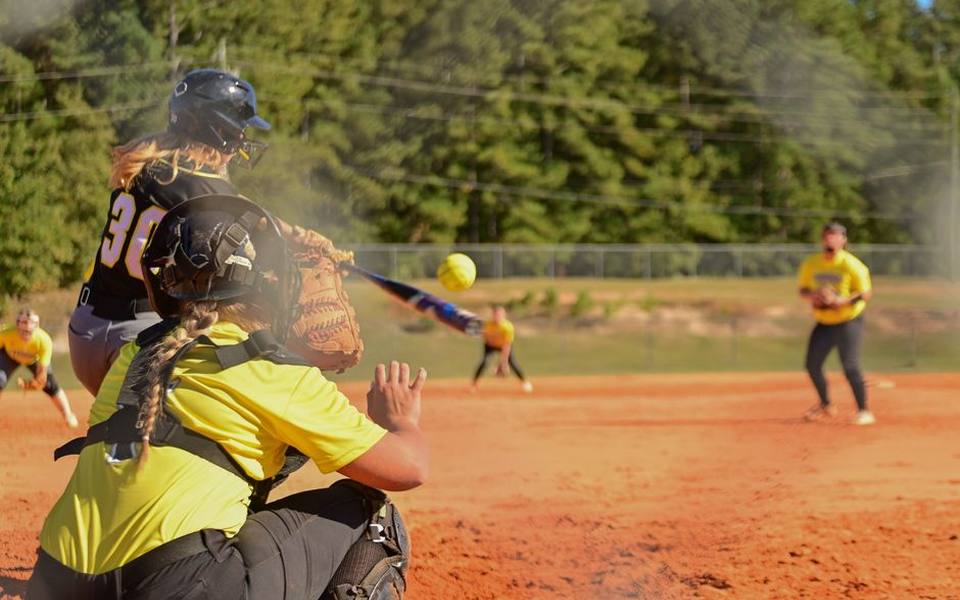
A dedicated thumb protector for baseball inserts directly into the catching mitt or secures to the athlete's hand to immobilize the joint against backward flexion. Without this reinforcement, the tip of the thumb absorbs the full force of missed pitches, foul tips, and balls framed along the outer edges of the strike zone. Even the stiffest leather mitts soften after broken-in usage, significantly reducing built-in structural support.
Using a thumb guard for baseball catcher applications creates a rigid bridge across the vulnerable joint, spreading the impact across the metacarpal bone and palm rather than concentrating pressure on the delicate thumb socket. Catchers at every competitive tier, from high school travel circuits to collegiate leagues, routinely treat this small accessory as an indispensable piece of protective armor.
Catching injuries often develop gradually rather than from a single dramatic collision. Repetitive micro-trauma causes swelling and weakness in the gripping muscles, degrading pitch-framing stability and throwing mechanics. Introducing proper protection early helps players maintain hand strength across long seasons and demanding tournament weekends.
Custom-Molding and Gel-to-Shell Thumb Guards
In recent years, custom-molding technology has replaced generic plastic splints as the standard thumb guard for catching. Popular systems, including moldable gel-to-shell models like the widely recognized EvoShield thumb guard designs, arrive soft and flexible inside sealed foil packaging. Once exposed to air, the specialized composite resin initiates a chemical hardening process that transforms the pliable pad into a rigid, customized protective shield.
An EvoShield catcher's thumb guard must be shaped directly against the player's hand inside their actual mitt to achieve an exact contour. Because hands differ dramatically in finger length, palm width, and knuckle spacing, a customized shield eliminates the pinching, hot spots, and bulkiness common with off-the-shelf plastic inserts. The hardened shell rests flush against the skin, locking the thumb in an optimal receiving position.
Investing in an EvoShield baseball catcher's thumb guard allows athletes to maintain a natural grip without altering how their fingers wrap inside the finger stalls. Generic guards often force the hand open too wide, which ruins the feel for clean exchanges when throwing out baserunners. A true custom-formed shield creates an imperceptible barrier that only engages when forced backward by the impact of a baseball.
If you catch regular bullpen sessions or take extended defensive drills at indoor batting cages, molding your guard under authentic conditions is essential. Wear your normal batting glove or inner fielding glove if you use one during games, ensuring the shield forms with the exact clearance you need on game day.
How to Properly Fit a Catcher's Thumb Protector
Fitting a catchers thumb guard correctly demands strict attention to timing and positioning. When opening an air-activated guard, you typically have about twenty to thirty minutes before the polymer solidifies completely. Begin by wrapping the flexible material around the lower thumb and the base of the wrist, making sure the rigid bridge covers the joint connecting the thumb to the hand.
Once wrapped, slide your hand into your catcher's mitt and close the glove firmly around a baseball. Hold this position steadily for roughly twenty minutes while the material cures. Forming the protector directly inside the mitt forces the outer contours of the guard to match the internal structure of the glove pocket, preventing painful pressure points during heavy catching duty.
Check that the completed thumb guard baseball catcher insert allows your index finger and wrist to flex freely without catching against the edges. The guard should end just below the thumbnail to avoid interfering with glove manipulation, while the base should extend far enough down the thumb pad to transfer energy into the heel of the hand.
If the fit feels uneven after curing, most composite guards cannot be reshaped with heat, meaning they must be worn as molded or replaced entirely. Taking careful steps during the initial twenty-minute hardening window ensures a snug, seamless barrier that lasts an entire competitive season without slipping or warping.
Measuring Head Circumference for Batting Helmets
Accurate batting helmet sizing begins with a flexible fabric measuring tape rather than guessing based on fitted cap numbers. Wrap the tape around the widest part of the player's head, positioning it approximately one inch above the eyebrows and just over the ears where a standard hat rests. Keep the tape level and snug against the hair without pulling it tight enough to cause skin indention.
Record the measurement in both inches and centimeters, as different manufacturers use varying units on their sizing tags. If the player frequently wears braided hairstyles, thick hair ribbons, or padded skull caps beneath their helmet, take the measurement with those items in place to avoid buying an uncomfortably tight shell that rides dangerously high on the forehead.
Helmets that sit too loose slide over the eyes during running strides or shift violently when the batter ducks away from inside pitches, creating dangerous blind spots. Conversely, an overly tight helmet causes painful temple pressure, headaches, and distractions in the batter's box. The ideal fit seats the helmet level on the skull, resting roughly one finger-width above the brow ridge.
When evaluating helmet sizes during practice sessions at professional baseball & softball training facilities, have the athlete shake their head vigorously from side to side and forward to back. If the helmet slides or twists on the forehead without the skin moving with the padding, the shell is too large and requires additional pad inserts or a smaller size.
Interpreting Batting Helmet Size Charts
Consulting a reliable batting helmet size chart helps translate raw head measurements into standard commercial categories like Youth, Intermediate, and Adult, or traditional hat fractions. Most youth helmets accommodate head circumferences between 6 1/4 and 6 7/8 inches (approximately 19.5 to 21.5 inches), while adult sizes generally span from 7 to 7 3/4 inches (roughly 22 to 24.5 inches).
Manufacturers design dual-density foam systems that compress slightly to conform to individual head shapes, but shell dimensions differ across product lines. Some brands engineer rounder shells suited for circular head shapes, while others feature oval profiles that provide deeper coverage along the sides. Checking the manufacturer-specific batting helmet sizes chart before ordering online prevents awkward returns and improper fits.
For youth players straddling two categories, sizing down to the smaller bracket or using official manufacturer-approved fit kits with thicker interior jaw pads is far safer than sizing up into a loose shell. Modern padding kits allow families to customize interior spacing without compromising the structural certification of the protective outer shell.
Every certified helmet sold in organized youth and scholastic leagues must display an exterior seal from the National Operating Committee on Standards for Athletic Equipment (NOCSAE). Never modify a helmet by drilling holes or shaving foam to make it match size chart numbers, as unauthorized alterations instantly void the safety certification.
Softball Helmet Sizing and Faceguard Clearances
Selecting appropriate softball helmet sizes requires considering both skull circumference and the integrated protective faceguard required across most youth and adult fastpitch leagues. Fastpitch helmets often feature tailored padding designed to accommodate ponytails or hair channels along the rear rim, preventing the helmet from being forced downward over the batter's brow line.
When mounting or checking a faceguard, the horizontal viewing wire must sit directly below the player's natural line of sight, never directly across the pupils. The gap between the wire bars should offer an unobstructed view of the pitcher's release point while remaining narrow enough to prevent an 11-inch or 12-inch softball from penetrating through to make facial contact.
Chin straps are mandatory in many youth softball divisions to keep the helmet firmly anchored during rapid swings and aggressive sliding into bases. Adjust the strap so it fits snugly beneath the chin bone with just enough slack to allow normal speaking and breathing. If the strap pulls the helmet backward off the forehead, the helmet interior padding is improperly seated.
Practicing tracking pitches while wearing full facial gear during structured batting cages with hitting lessons acclimates hitters to the subtle optical presence of the wire cage. Hitters who fail to practice in their exact game equipment often complain of spatial distortion or discomfort when stepping into competitive plate appearances.
Integrating Chest Protectors and Leg Guards for Catchers
A catcher's gear set functions as a coordinated defense system, where the chest protector and leg guards must link smoothly with the helmet and throat guard. To size a chest protector, measure from the base of the throat at the sternal notch down to the navel. A properly fitted protector shields the collarbone, ribs, and sternum without extending past the beltline where it would bunch up when squatting.
Modern amateur regulations mandate that chest protectors include certified commotio cordis protection, featuring a built-in composite plate over the heart to dissipate blunt impacts that could disrupt cardiac rhythm. The harness straps behind the shoulders and around the ribs must be adjusted until the chest plate sits tight against the body, leaving no gap beneath the chin when looking downward.
Leg guards require measuring from the center of the kneecap down to the ankle bend. Guards that are too long will dig into the tops of the player's cleats, limiting mobility and slowing their recovery when blocking balls in the dirt. Conversely, short guards leave the upper shin or lower ankle exposed to foul balls ricocheting off the plate.
Knee savers—padded wedges strapped behind the calves—are widely used among youth catchers to reduce knee strain during extended innings. Ensure that any knee supports do not tilt the leg guards forward, which would open a hazardous seam between the top of the shin plate and the bottom of the floating knee cap.
Testing Protective Gear in Practice and Cages
Before trusting any new protective setup in a competitive match, players should run through full-intensity drills in a controlled practice environment. Start with basic functional movements: jumping, sprinting, sliding, and dropping rapidly into a blocking posture. If any piece shifts significantly or pinches against the skin, harness straps and internal padding need immediate adjustment.
Batters should take full-speed swings in an automated batting cage to confirm that their helmet remains stable throughout the entire hip turn and head rotation. If a batting helmet slides down over the eyebrows during the finish, the interior foam lacks sufficient tension against the temples, or the jaw pads are too thin for the athlete's facial structure.
Catchers need to receive live throwing from pitchers or pitching machines to evaluate their thumb protector under real ballistic force. A well-fitted guard should render high-velocity strikes painless, allowing the catcher to receive the ball deep into the pocket without guarding their hand or flinching on low breaking pitches.
Parents and coaches across the country can explore regional batting and catching facilities through the Batting Cage Atlas directory to find indoor turf tunnels, pitching lanes, and specialized training complexes where athletes can dial in their gear adjustments before opening day arrives.
Long-Term Maintenance and When to Retire Gear
Baseball and softball protective gear endures severe environmental wear, from intense summer heat and sweat buildup to repeated high-velocity strikes. To preserve composite shells and shock-absorbing foam, clean helmets and chest protectors using mild soapy water and a soft cloth. Never use harsh chemical cleaners, solvent sprays, or abrasive scrub pads, which can degrade protective polymers and weaken structural integrity.
Inspect batting helmets regularly for hairline cracks around the ear holes, visor edges, and faceguard mounting screws. Any helmet that shows structural cracking or contains compressed, brittle foam that no longer rebounds should be discarded immediately. Most safety organizations recommend replacing non-damaged helmets every three to five years, depending on usage intensity and environmental exposure.
Catchers should examine the webbing, buckles, and rivets on their chest protectors and leg guards before every weekend tournament. Corroded metal clips or frayed elastic harnesses can suddenly snap during a slide or block, creating instant hazards. Replacing worn harness straps as soon as they lose elasticity keeps equipment fitting snugly against the body throughout the season.
Thumb guards must be inspected for micro-cracks along the perimeter and flex joints. If a molded resin shell begins to crack or soften from repeated impacts, its ability to distribute force into the palm disappears. Replacing a cracked thumb protector is a minimal expense compared to the prolonged recovery time required for a torn ulnar collateral ligament in the hand.
Published 2026-09-21 · reviewed with each rebuild, last October 2026.
Find batting cages & baseball training near you
The directory lists 7,750 batting cages & baseball training by state and city — pick your state or use the “Near me” button in the header.
More guides
-
 Owning
Mastering Softball Mechanics: From Cage Drills to Game-Day Power
-
 Money
MoneyUnderstanding the Expenses of Renting and Building Batting Cages
-
 Safety
Pitching Mechanics: How to Throw Breaking Balls and Build Arm Velocity
-
 Service
Fundamental Swing Mechanics and Handling Breaking Pitches
-
 Owning
Slow Pitch Softball Hitting Guide: Mechanics for Power and Contact
-
 Owning
Building a Consistent Softball Swing: Mechanics, Drills, and Practice Routines
-
 Safety
Pitching Mechanics: Throwing Breaking Pitches and Building Velocity Safely
-
 Owning
Understanding Travel Baseball: Costs, Commitments, and Evaluating the Fit
-
 Buying
Ultimate Guide to Batting Cages and Hitting Nets: Types, Sizing, and Setup
-
 Safety
Youth Baseball Rules: Field Dimensions, Pitch Limits, and Age Brackets
-
 Owning
Batting Practice Essentials: Pitching Machines, Hitting Drills, and Training Equipment
-
 Buying
Baseball & Softball Bat Buying Guide: Sizing, Materials, Certifications, and Custom Options
-
 Owning
Agility Ladder Workouts and Footwork Drills for Baseball and Softball
-
 Owning
Baseball & Softball Glove Guide: Sizing, Break-In, Relacing, and Maintenance
-
 Buying
Official MLB and Minor League Team Stores: Buying Authentic Fan Gear
-
 Service
Understanding Baseball Sabermetrics: Core and Advanced Stats Explained
-
 Service
Corporate Team Building Guide: Outings, Events, and Venue Selection
-
 Buying
A Complete Guide to Ordering Custom Baseball Uniforms and Team Apparel
-
 Buying
Custom Sports Jerseys Guide: Outfitting Soccer, Track, Volleyball, and Football Teams
-
 Owning
Complete Little League Guide: Schedules, Divisions, Rules, and Grants
-
 Buying
Local Sporting Goods Stores: Finding Gear, Trade-Ins, and Used Bats
-
 Buying
Baseball Birthday Party Ideas: Decorations, Supplies, and Themes
-
 Service
Youth Baseball and Softball Camps: Showcases, Academies, and Clinics
-
 Buying
Custom Fan Apparel and Varsity Jackets: Customization and Sizing
-
 Safety
Youth Pitching Arm Safety: Treating Little League Elbow and Shoulder Injuries
-
 Buying
Custom Baseball and Softball Uniforms: Design, Sublimation, and Ordering Guide
-
 Owning
Youth Baseball and T-Ball Drills: Practice Plans for Coaches and Parents
-
 Safety
Youth Baseball Sizing Guide: Batting Helmets, Gloves, and Protective Gear
-
 Buying
Commercial and Backyard Pitching Machines: Buyer's Guide and Field Maintenance
-
 Service
How to Choose and Enroll in Baseball and Softball Training Camps
-
 Service
Baseball & Softball Hitting Instruction, Swing Tech & Private Coaching Guide
-
 Safety
Baseball & Softball Helmet Sizing and Fit Guide
-
 Owning
How to Build and Outfit a Batting Cage and Hitting Facility
-
 Service
Baseball & Softball Glove Relacing, Restringing, and Care Guide
-
 Safety
Catcher's Gear Sizing, Protection, and Defensive Blocking Mechanics
-
 Service
Baseball Camps, Youth Academies, and Showcase Tryouts Guide
-
 Owning
Adult Baseball, Softball, and Backyard Leagues: A Complete Guide to Modern Formats
-
 Service
Planning Team Building Events, Parties, and Fundraisers at Sports Venues
-
 Service
Softball Mechanics, Pitch Grips, and Gear Sizing Guide