Finding the Proper Glove Size Across Youth Divisions
Selecting the correct glove begins with measuring from the tip of the index finger straight down the leather face to the heel of the palm. A proper youth baseball glove size chart generally starts around nine to nine and a half inches for tee-ball players between ages four and six. Moving up to coach pitch and early kid pitch divisions, seven- to nine-year-olds typically handle a ten to ten-and-a-half-inch model. Hand stalls on these younger patterns are specifically engineered narrower with shorter finger slots so small fingers can actually squeeze the leather shut.
Over-sizing a glove is one of the most common errors parents make when outfitting young ballplayers. Giving an eight-year-old an adult pattern or even an eleven-and-a-half-inch model causes the hand to slide awkwardly inside the stall, forcing the child to squeeze with their palm rather than closing their fingertips around the ball. For fastpitch players, youth softball glove sizes run slightly larger—usually ten and a half to eleven inches for beginners—because they need to secure an eleven-inch soft-stitch softball without creating excessive wrist fatigue.
As ballplayers transition into standard Little League or competitive travel ball around ages ten to twelve, glove patterns shift toward eleven to eleven and three-quarter inches. At this stage, leather quality often jumps from soft synthetic blends to full-grain steerhide. These stiffer hides hold their pocket shape across long seasons but require patient break-in work before game action. Spending time catching off pitching machines at local batting cages helps young athletes get accustomed to closing a new glove against real ball impact.
Position Specific Sizing for Baseball and Softball
Infielders in baseball favor shorter lengths to maximize transfer speed from the pocket to the throwing hand. Standard 11 inch baseball gloves work exceptionally well for second basemen and middle infielders who need a shallow pocket and quick releases on double plays. Shortstops and third basemen often move up slightly to eleven and a quarter or eleven and three-quarters inches to handle harder ground balls down the line while retaining pocket control.
Outfielders require deeper pockets and longer reaches to snag fly balls on the dead run and track line drives in the gaps. Baseball outfield models typically measure between twelve and twelve and three-quarters inches, usually paired with durable H-webs or trapeze webbing. By contrast, softball mitt sizes reflect the larger diameter of the ball; fastpitch outfielders frequently use twelve and a half to thirteen-inch gloves, while a 13 inch softball glove is considered the standard benchmark for adult slowpitch fielders across almost all positions.
Slowpitch patterns need extra pocket depth because a twelve-inch softball carries significant volume and momentum on line drives. A thirteen-inch pattern gives slowpitch outfielders the necessary web width without forcing them to catch strictly in the palm. If you split time between infield and outfield in recreation leagues, a twelve-and-a-half-inch fastpitch or slowpitch hybrid pattern typically offers a practical middle ground that handles grounders cleanly without sacrificing fly-ball reach.
Catcher Mitt Specifications and Sizing Differences
Unlike standard fielding gloves that measure linear length, catcher mitts use circumference measured in inches around the entire perimeter of the perimeter padding. Youth baseball catchers usually begin with a thirty-one to thirty-two-inch circumference mitt. This sizing provides sufficient target area for pitchers while keeping the overall leather weight light enough for quick framing and blocking fundamentals without dragging the wrist downward.
High school, college, and adult baseball catchers typically swing toward thirty-two and a half to thirty-four inches. Fastpitch catcher mitts feature a different inner construction: the pocket is scooped deeper to wrap around an eleven- or twelve-inch softball, and the hand stall is tailored tighter to suit female hand dimensions. High-end mitts feature heavy leather padding along the thumb and pinky beams to absorb repetitive high-velocity pitches over hundreds of innings.
First base mitts represent another unique category, blending the extended length of an outfield glove with the curved, webbed edge of a mitt. They have no individual finger slots on the exterior and range from twelve to thirteen inches. Breaking in a dedicated mitt requires double the time of a standard infielder model because the internal perimeter padding is reinforced with dense layers of felt, wool, or plastic inserts to prevent ball spin from bending the thumb back.
Breaking In Stiff Leather Without Damaging the Structure
Getting new baseball gloves broken in properly demands mechanical repetition rather than extreme shortcuts. The goal is to create natural hinges at the thumb and pinky bases while forming a defined pocket centered right below the web. Start by striking the pocket repeatedly with a wooden glove mallet or an old baseball taped to a dowel. Drive the mallet into the leather where you want the ball to sit, angling impacts toward the base of the web.
Work the hinge points manually with your hands while watching television or resting in the dugout. Fold the pinky edge inward toward the thumb, then fold the thumb toward the index finger, working the stiff heel felt back and forth until the leather fibers loosen. Modern pre-treated leathers soften quickly, but traditional heavy steerhide or Japanese kip leather may take several weeks of diligent shaping before feeling game-ready.
Nothing replaces live catches for perfecting the final pocket contours. Taking dozens of throws during batting practice or fielding balls inside indoor batting cages settles the leather fibers around your specific hand pressure points. Catching real throws molds the pocket directly to the ball shape, ensuring that line drives and pop-ups seat securely without bouncing off the palm.
Break-In Shortcuts You Should Always Avoid
Amateur players frequently hear old clubhouse myths suggesting that baking a glove in a conventional oven, running it through a microwave, or leaving it on a hot car dashboard accelerates break-in. Applying intense dry heat is one of the quickest ways to ruin quality hide. Heat draws out natural tanning oils, turns internal padding brittle, and weakens the tensile strength of the rawhide laces, leading to sudden snaps on hard hits.
Soaking a glove completely submerged in a bucket of hot water is another damaging shortcut. While warm water can temporarily soften stiff leather for immediate mallet work, completely drowning the mitt saturates the thick internal felt pads. Saturated padding takes days to dry, frequently develops mold, and causes the glove to feel permanently soggy and heavy on the hand, destroying the glove's balanced feel.
Similarly, avoid dousing the leather in motor oil, petroleum jelly, or excessive amounts of raw linseed oil. These petroleum products degrade stitching over time and add permanent dead weight to the leather that cannot be extracted. Quality glove leather breathes naturally; smothering the pores with heavy automotive or synthetic lubricants leaves the palm slippery, attracts dirt like a magnet, and shortens the glove's lifespan.
Conditioning and Oiling Leather for Durability
Routine maintenance keeps leather supple and prevents surface cracking along the finger ridges and palm. When oiling a baseball mitt, less is always more. Apply a dime-sized dab of lanolin-based glove cream or specialized hide balm onto a clean microfiber cloth, never directly onto the leather face. Rub the balm in thin, even circular motions across the palm, the back fingers, and the interior lining of the hand stall.
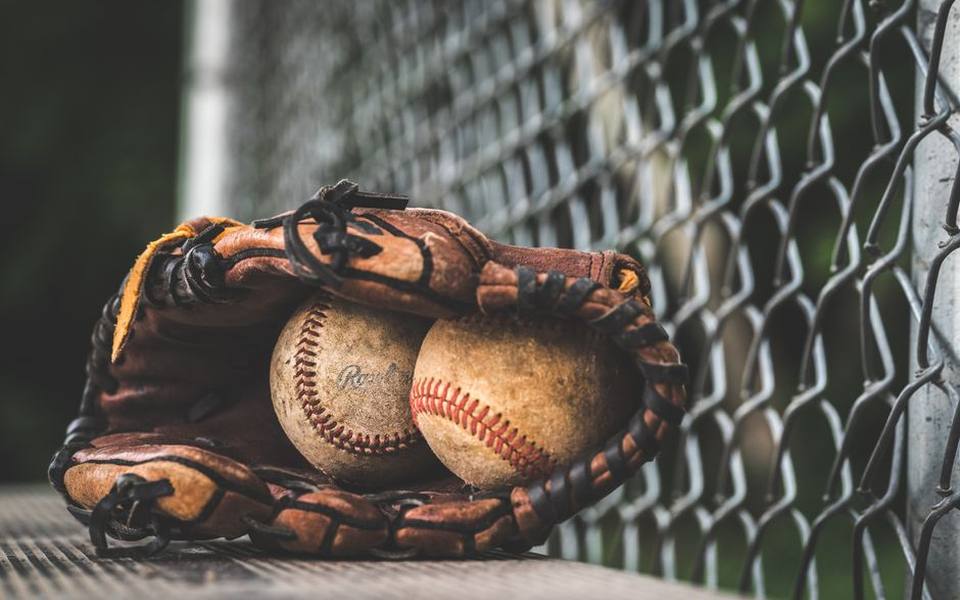
Knowing how to properly handle oiling a glove prevents buildup in the pocket crevices. Focus on high-friction zones: the web crotch, the palm fold, and the leather piping along the wrist opening where acidic sweat accumulates. When oiling a softball glove, account for the broader surface area by working one section at a time so the leather absorbs the conditioner evenly rather than creating dark, oversaturated blotches.
After applying conditioner, wipe down the exterior with a dry cloth to lift off excess grease and let the glove sit in a cool, ventilated room overnight. Conditioning once at the beginning of spring training and once right before winter storage typically suffices for most players. If you play tournament ball in dry, dusty climates or practice regularly at baseball and softball training facilities, a light monthly wipe-down removes abrasive chalk and dirt before it cuts into the leather grain.
Identifying Lacing Wear and Structural Damage
Rawhide laces endure massive friction every time a ball strikes the web or twists the finger tops. Inspect your glove periodically by checking the spiral laces along the fingers and the T-web or I-web anchors. If you notice laces flattening out, peeling into papery layers, or showing dry-rot cracks, they are on the verge of snapping during live play.
Catcher mitts experience severe stress along the spiral perimeter and the top web bar from high-velocity fastballs. Catchers glove repair often becomes necessary midway through a demanding spring season when the main pocket spiral begins to stretch and loosen. Catchers who work regular bullpen sessions or take hitting lessons catching live arms should examine their pocket tension weekly to prevent ball blow-throughs.
Ignoring stretched laces can warp the frame of the mitt permanently. When laces stretch excessively, the leather fingers splay outward, reducing closing control and allowing grounders to pop out of the web. Catchers mitt repair done early—simply tightening slack rawhide or replacing a single frayed strand—prevents expensive structural blowouts that could sideline your primary game gear right before tournament play.
Step-by-Step Relacing With Standard Replacement Kits
Restringing a glove at home requires minimal equipment: a sturdy lacing needle or threaded U-wire tool, a pair of needle-nose pliers, sharp shears, and replacement rawhide laces. A standard rawhide lace pack—such as a common glove relace kit found at most sporting goods counters—typically provides three to four thirty-six-inch rawhide strips measuring three-sixteenths of an inch wide, which is ample material to re-lace an entire web and finger line.
Before removing broken lace, photograph the glove from multiple angles to document the exact threading pattern. Untie one lace segment at a time rather than stripping the whole glove bare. Trim the leading tip of your new leather lace into a sharp wedge point and screw it securely into the threaded base of your metal lacing tool. Coat the lace lightly with leather balm or water to help it slide smoothly through the punched eyelets.
Thread the new lace following the original factory route, keeping the smooth, finished grain side facing outward toward the ball and the rough suede side against the glove body. Pull each loop snug with pliers, but avoid over-tightening; cinching the laces too stiffly prevents the pocket from flexing naturally when squeezing. Finish each segment with a square knot or traditional surgeon's knot, leaving about an inch of lace tail before trimming off the excess.
Restringing Catcher Mitts and Heavy-Impact Webs
Restringing catcher and first-base mitts requires thicker rawhide than standard fielders gloves. Standard field patterns use three-sixteenths-inch laces, but catcher mitt perimeters and web crowns often demand heavy-duty quarter-inch rawhide laces to withstand repetitive high-impact pitching. Using standard thin lace on a catcher's pocket creates premature breakage within just a few weeks of heavy bullpen usage.
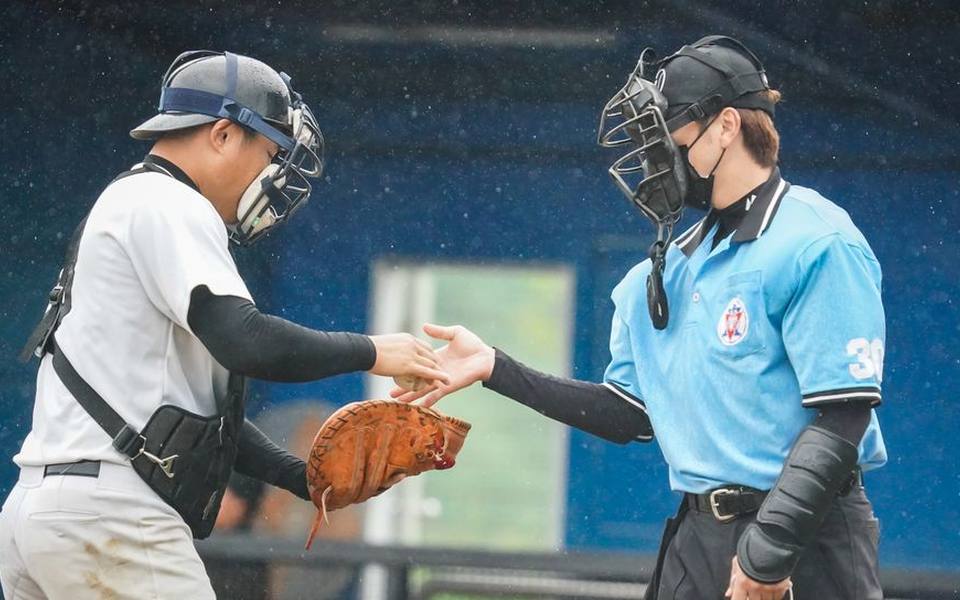
When performing catchers mitt repair on the outer web spiral, maintain consistent, firm tension across every consecutive hole. If one loop sits slack while its neighbor is pulled tight, the loose loop absorbs disproportionate impact shock and snaps quickly. Use your pliers to seat each loop flat against the leather rim, making sure the lace never twists inside the eyelet holes as you pull it through.
Tying off the final knot on a catcher's mitt requires extra care because a knot slipping loose mid-inning creates a severe safety hazard. Double-check that your anchor knot seats flush against the leather casing on the thumb or pinky stay. After restringing, test the pocket rigidity by catching firm mallet strikes or throwing softballs into the web to let the new rawhide settle into its functional shape.
Off-Season Storage and Preserving Pocket Shape
How you store your glove during the winter months directly determines how much prep work it will need when spring practices resume. Never toss a baseball or softball mitt loose into the bottom of a gear bag where heavy cleats, bats, or catcher helmets can crush the fingers flat. A crushed glove develops inverted hinges that fight against natural hand closure.
To preserve the pocket shape, place a baseball or softball into the sweet spot of the pocket, fold the fingers inward in a natural grip, and secure the glove loosely with an elastic glove wrap or wide rubber band. Store the glove resting palm-down or thumb-down on a shelf in a climate-controlled room. Basements with high humidity promote mildew growth on raw leather, while hot attics dry out the natural oils in the hide.
Before packing the glove away for extended off-season breaks, wipe off all field dust, clay, and sweat residue with a damp towel, then let it dry thoroughly at room temperature. Applying a very light coat of leather conditioner right before storage protects the exterior skin against ambient humidity fluctuations. When spring rolls around, your glove will remain supple, responsive, and ready for opening day.
Published 2026-09-21 · reviewed with each rebuild, last October 2026.
Find batting cages & baseball training near you
The directory lists 7,750 batting cages & baseball training by state and city — pick your state or use the “Near me” button in the header.
More guides
-
 Owning
Mastering Softball Mechanics: From Cage Drills to Game-Day Power
-
 Money
MoneyUnderstanding the Expenses of Renting and Building Batting Cages
-
 Safety
Pitching Mechanics: How to Throw Breaking Balls and Build Arm Velocity
-
 Service
Fundamental Swing Mechanics and Handling Breaking Pitches
-
 Owning
Slow Pitch Softball Hitting Guide: Mechanics for Power and Contact
-
 Owning
Building a Consistent Softball Swing: Mechanics, Drills, and Practice Routines
-
 Safety
Pitching Mechanics: Throwing Breaking Pitches and Building Velocity Safely
-
 Owning
Understanding Travel Baseball: Costs, Commitments, and Evaluating the Fit
-
 Buying
Ultimate Guide to Batting Cages and Hitting Nets: Types, Sizing, and Setup
-
 Safety
Youth Baseball Rules: Field Dimensions, Pitch Limits, and Age Brackets
-
 Owning
Batting Practice Essentials: Pitching Machines, Hitting Drills, and Training Equipment
-
 Buying
Baseball & Softball Bat Buying Guide: Sizing, Materials, Certifications, and Custom Options
-
 Owning
Agility Ladder Workouts and Footwork Drills for Baseball and Softball
-
 Safety
Protective Baseball Gear Guide: Catchers Gear, Thumb Guards, and Helmet Sizing
-
 Buying
Official MLB and Minor League Team Stores: Buying Authentic Fan Gear
-
 Service
Understanding Baseball Sabermetrics: Core and Advanced Stats Explained
-
 Service
Corporate Team Building Guide: Outings, Events, and Venue Selection
-
 Buying
A Complete Guide to Ordering Custom Baseball Uniforms and Team Apparel
-
 Buying
Custom Sports Jerseys Guide: Outfitting Soccer, Track, Volleyball, and Football Teams
-
 Owning
Complete Little League Guide: Schedules, Divisions, Rules, and Grants
-
 Buying
Local Sporting Goods Stores: Finding Gear, Trade-Ins, and Used Bats
-
 Buying
Baseball Birthday Party Ideas: Decorations, Supplies, and Themes
-
 Service
Youth Baseball and Softball Camps: Showcases, Academies, and Clinics
-
 Buying
Custom Fan Apparel and Varsity Jackets: Customization and Sizing
-
 Safety
Youth Pitching Arm Safety: Treating Little League Elbow and Shoulder Injuries
-
 Buying
Custom Baseball and Softball Uniforms: Design, Sublimation, and Ordering Guide
-
 Owning
Youth Baseball and T-Ball Drills: Practice Plans for Coaches and Parents
-
 Safety
Youth Baseball Sizing Guide: Batting Helmets, Gloves, and Protective Gear
-
 Buying
Commercial and Backyard Pitching Machines: Buyer's Guide and Field Maintenance
-
 Service
How to Choose and Enroll in Baseball and Softball Training Camps
-
 Service
Baseball & Softball Hitting Instruction, Swing Tech & Private Coaching Guide
-
 Safety
Baseball & Softball Helmet Sizing and Fit Guide
-
 Owning
How to Build and Outfit a Batting Cage and Hitting Facility
-
 Service
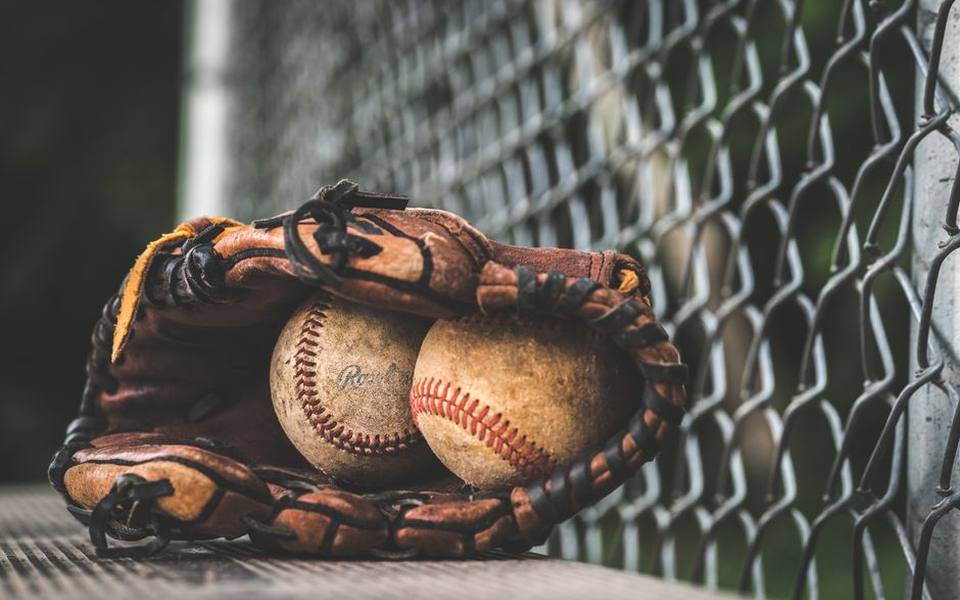
Baseball & Softball Glove Relacing, Restringing, and Care Guide
-
 Safety
Catcher's Gear Sizing, Protection, and Defensive Blocking Mechanics
-
 Service
Baseball Camps, Youth Academies, and Showcase Tryouts Guide
-
 Owning
Adult Baseball, Softball, and Backyard Leagues: A Complete Guide to Modern Formats
-
 Service
Planning Team Building Events, Parties, and Fundraisers at Sports Venues
-
 Service
Softball Mechanics, Pitch Grips, and Gear Sizing Guide